Can I Install Landscape Edging? Well, that’s a good question.
As a landscape professional with years of experience, I can confidently tell you that installing landscape edging yourself is possible with the right tools and knowledge. This DIY guide will walk you through the entire process, from selecting materials to finishing touches, so you can achieve professional-looking results while saving on labor costs.
Understanding Landscape Edging: Purpose and Benefits
Landscape edging serves multiple essential functions in your outdoor space:
- Creates clear boundaries between different areas (lawn, garden beds, pathways)
- Prevents material washout during heavy rains
- Stops grass from invading garden beds
- It provides a clean, finished look to your landscape
- Makes lawn maintenance easier by creating mow-friendly boundaries
Installing landscape edging yourself can save between $400 and $800 on a typical residential project, making it an attractive DIY option for budget-conscious homeowners.
Choosing the Right Material for Your DIY Project
Before you begin your DIY landscape edging installation, select the appropriate material. Each option has distinct characteristics that affect installation difficulty, durability, and aesthetics.
Material Options Comparison Table
| Material Type | DIY Cost per Linear Foot | Professional Installation Cost | Expected Lifespan | Difficulty to Install | Best Used For |
|---|---|---|---|---|---|
| Metal | $12-24 | $30-48 | 15-20+ years | Moderate | Modern designs, clean lines |
| Plastic | $4-12 | $20-30 | 3-7 years | Easy | Curved beds, budget projects |
| Wood | $6-16 | $24-40 | 3-10 years | Easy | Rustic landscapes, raised beds |
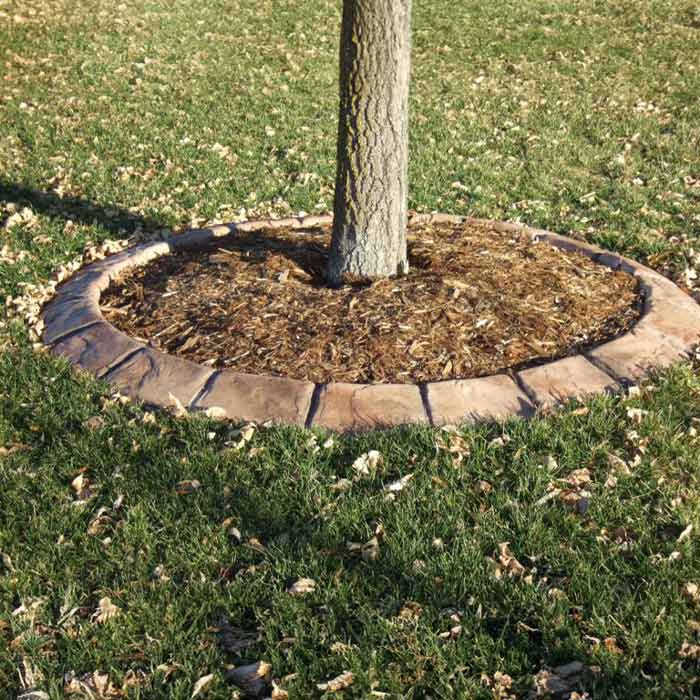
| Concrete | $10-20 | $28-44 | 20+ years | Difficult | High-traffic areas, permanent solutions |
| Stone/Brick | $16-70 | $36-100 | 20+ years | Difficult | Formal gardens, high-end properties |
| Aluminum | $18-36 | $40-60 | 20+ years | Moderate | Contemporary designs, durable edging |
| Rubber | $8-15 | $24-34 | 10-15 years | Easy | Kid-friendly areas, flexible designs |
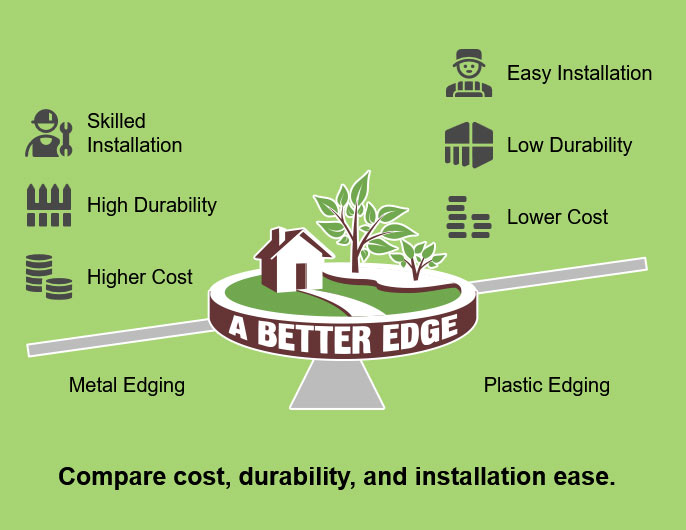
Metal Landscape Edging
Pros: Sleek appearance, extremely durable, creates clean lines. Cons: More expensive ($12-24 per linear foot), requires more installation skill. Expected lifespan: 15-20+ years with minimal maintenance
Metal edging provides a contemporary look that’s perfect for modern landscape designs. While installation requires more precision, the long-term durability makes it worth considering for serious DIYers.
Plastic Landscape Edging
Pros: Affordable ($4-12 per linear foot), lightweight, easy to install. Cons: Less durable, can become brittle over time. Expected lifespan: 1-3 years before significant maintenance, 3-7 years before replacement
This is often the easiest option for first-time DIYers due to its flexibility and simple installation process.
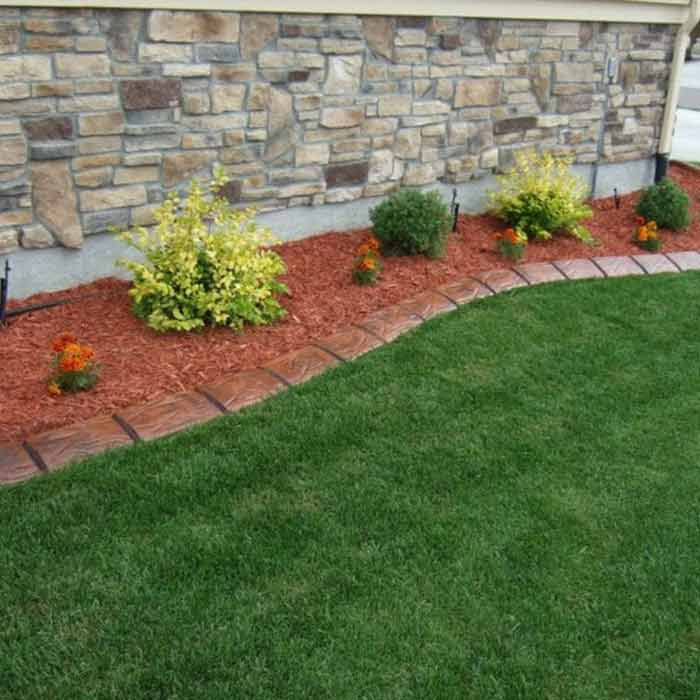
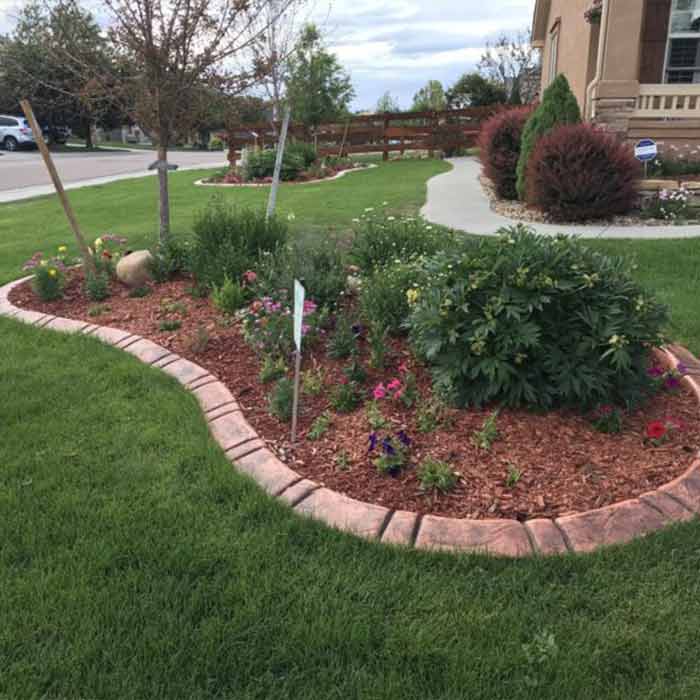
Concrete Landscape Edging
Pros: Extremely durable, versatile design options. Cons: Heavy, labor-intensive to install. Expected lifespan: 20+ years with proper installation
Concrete edging requires more effort but provides exceptional longevity, making it cost-effective in the long run.
Wood Landscape Edging
Pros: Natural appearance, relatively inexpensive ($6-16 per linear foot). Cons: Susceptible to rot and insect damage. Expected lifespan: 1-2 years before maintenance, 3-10 years before replacement
Perfect for rustic designs, but requires regular maintenance to prevent deterioration.
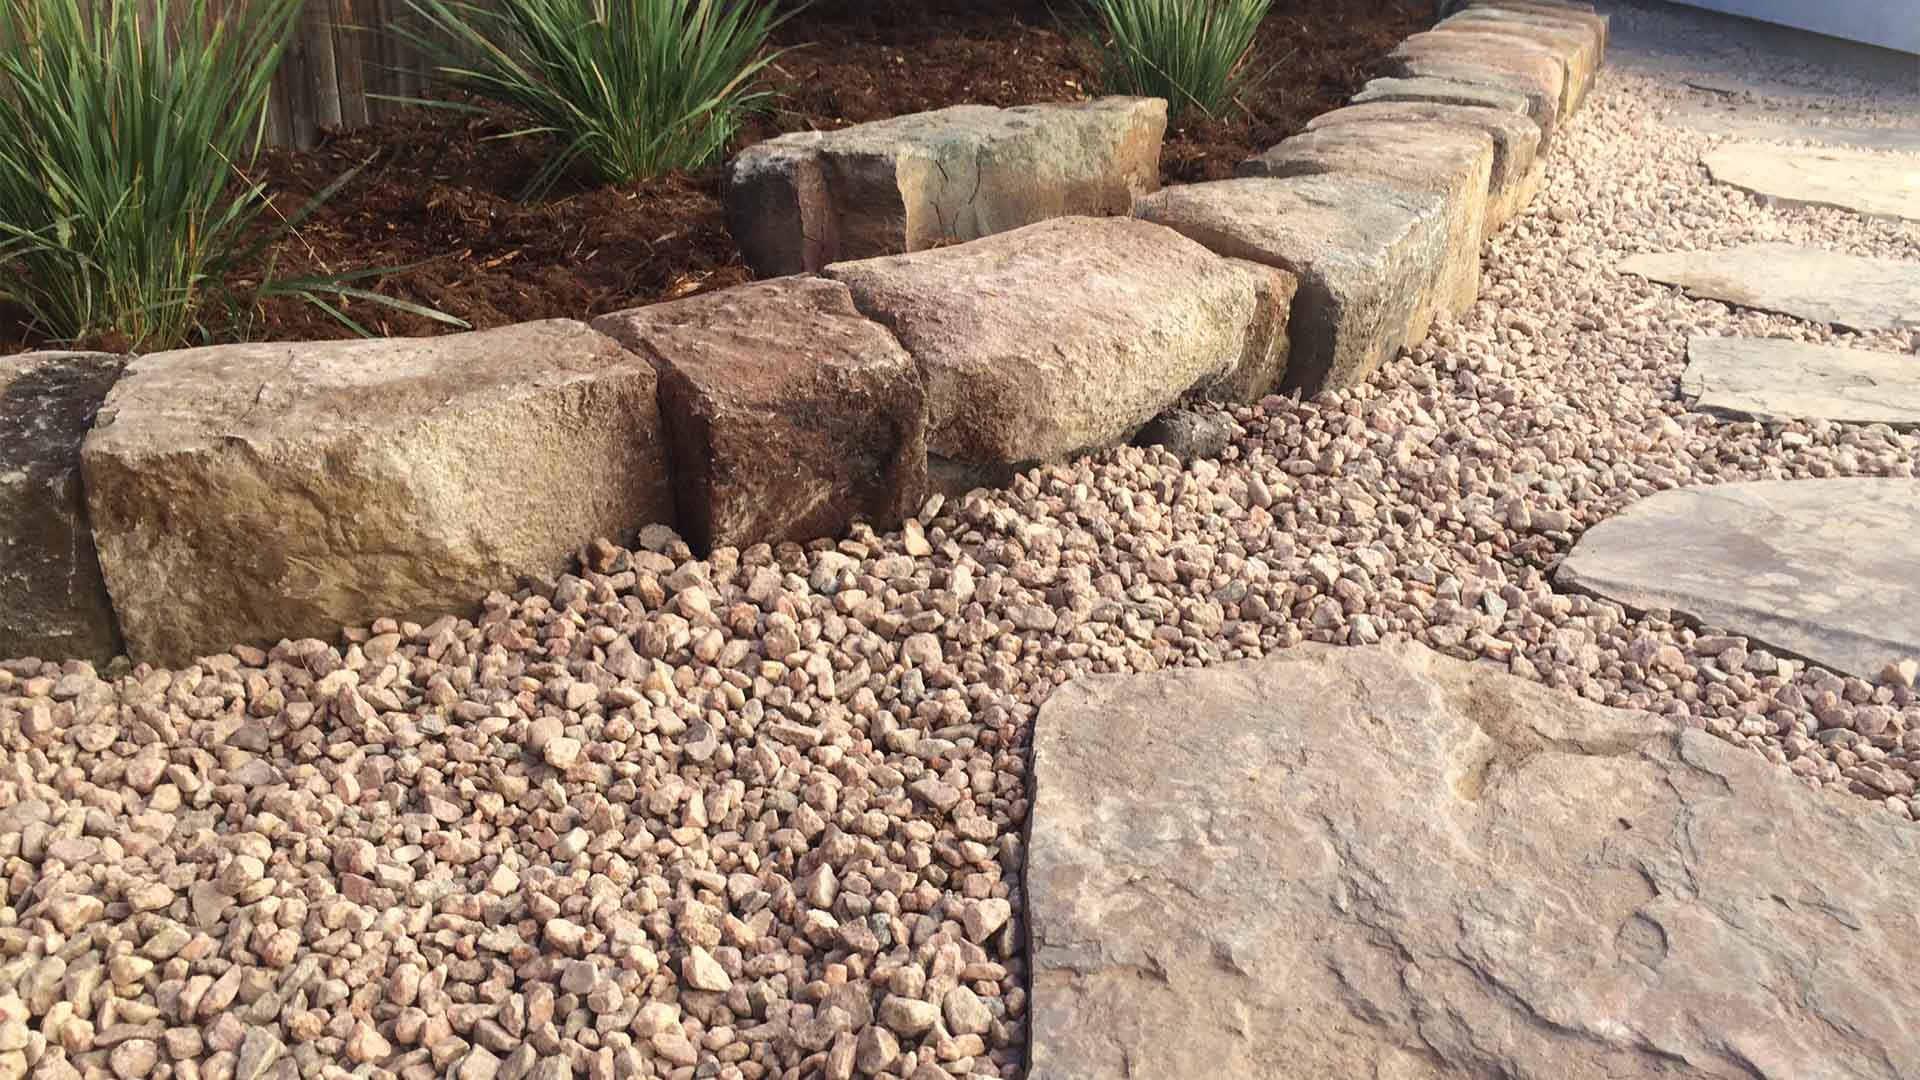
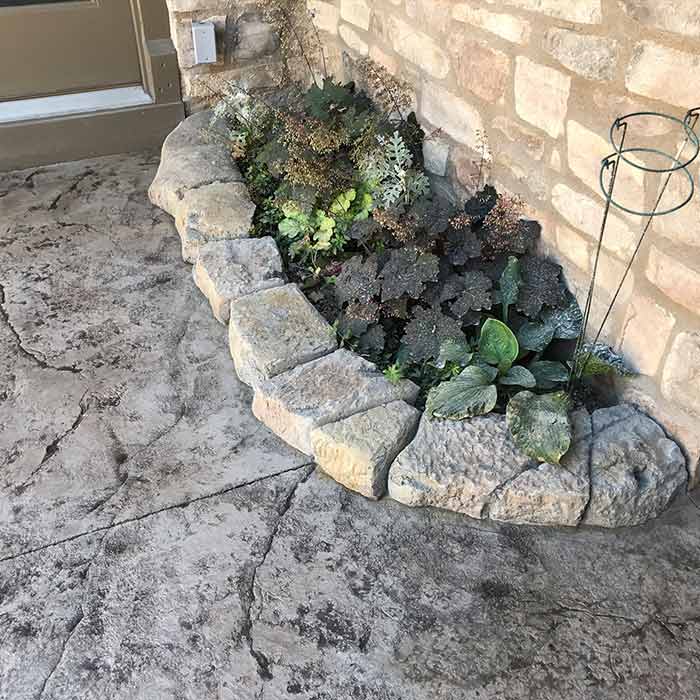
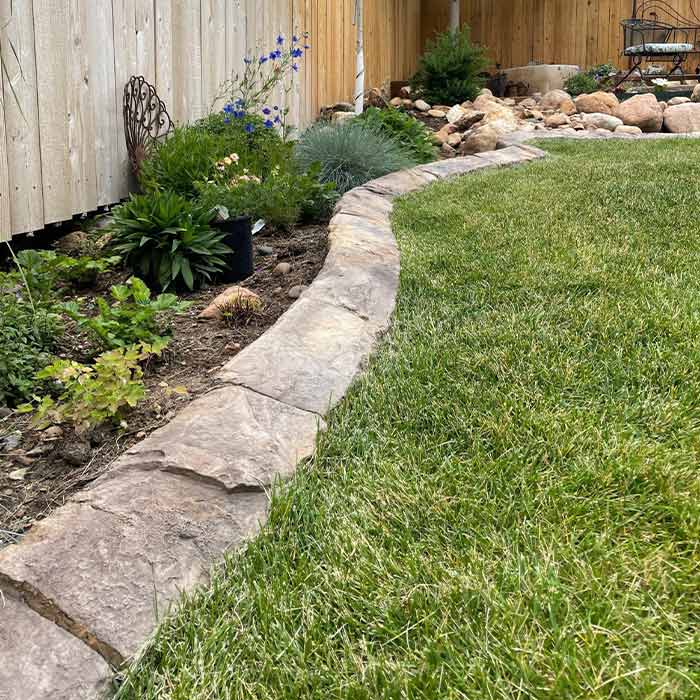
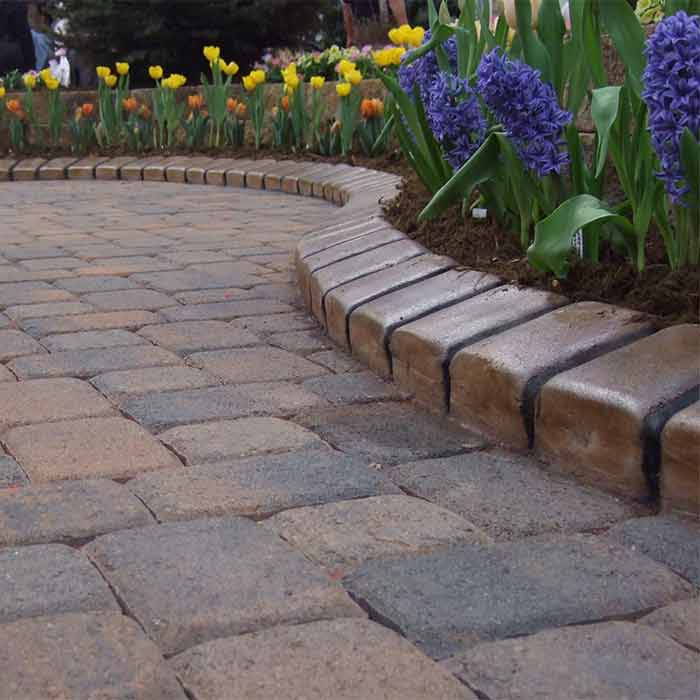
Stone/Brick Landscape Edging
Pros: Elegant appearance, extremely durable. Cons: Expensive ($16-70 per linear foot), requires more skill to install correctly. Expected lifespan: 20+ years with proper installation
While more challenging for DIYers, stone edging creates a timeless, high-end look that significantly enhances property value.
Essential Tools for DIY Landscape Edging Installation
Having the right tools is critical for a successful DIY landscape edging project:
- Measuring tape
- Garden hose or spray paint (for marking the edging line)
- Shovel or edging spade
- Rubber mallet
- Level
- String and stakes
- Gloves and safety glasses
- Wheelbarrow (for material transport)
- Reciprocating saw (for cutting thicker materials)
- Garden rake
- Tamper (for compacting soil)
For metal or plastic edging, you’ll also need:
- Tin snips or hacksaw
- Metal file (to smooth cut edges)
Material-Specific Tools
| Material | Additional Tools Needed |
|---|---|
| Metal | Tin snips, hacksaw, metal file, heavy-duty gloves |
| Plastic | Utility knife or pruning shears |
| Wood | Saw, drill, screws, or nails |
| Concrete | Mixing container, trowel, edging tool |
| Stone/Brick | Masonry hammer, chisel, mortar mixing tools (if applicable) |
Step-by-Step DIY Landscape Edging Installation Guide
1. Planning and Preparation
Before you begin to install landscape edging, proper planning is essential:
- Design your layout: Use a garden hose to create smooth curves, stakes, and string for straight lines.
- Measure carefully: Calculate the linear footage needed, adding 10% extra for waste.
- Call utility companies: Always contact local utilities to mark underground lines before digging.
- Gather all materials and tools: Ensure you have everything needed before starting.
“The difference between an amateur and professional landscape installation often comes down to the quality of preparation. Take your time during this phase to ensure the best results.” – Chad, Owner of A Better Edge
2. Excavation Techniques
Proper trench preparation is crucial for stable edging installation:
- Dig a trench that’s:
- 4-6 inches deep for most edging types
- Slightly wider than your edging material
- Following your marked layout precisely
- For curved sections:
- Make the trench slightly wider on curves
- Ensure smooth, gradual transitions
- Remove all roots, rocks, and debris from the trench
Pro Tip: Water the soil lightly if it’s too hard to dig, but avoid working with muddy soil.
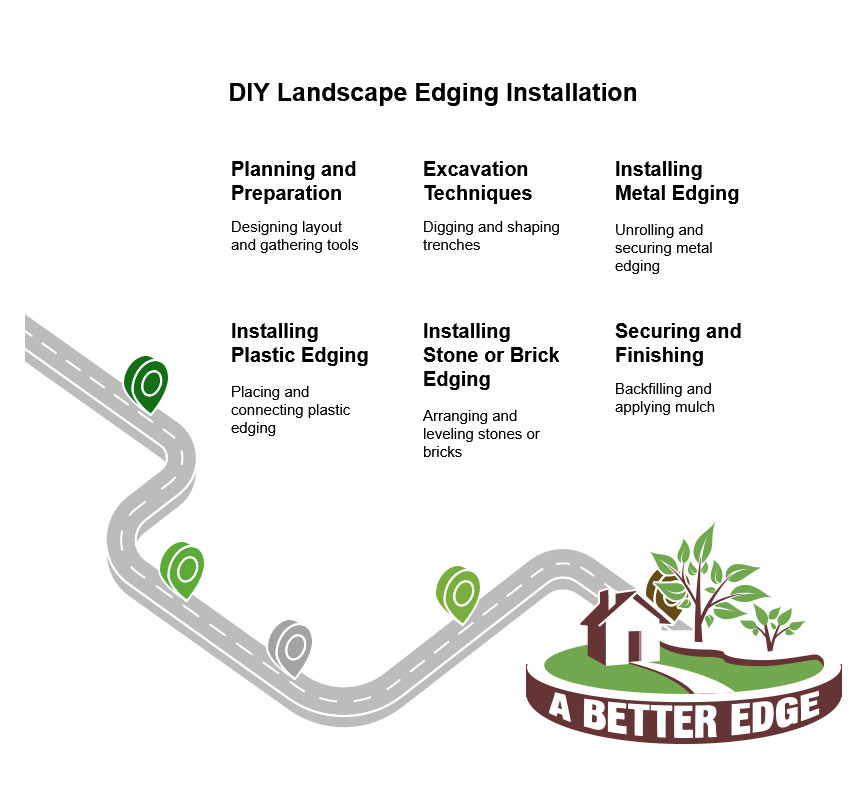
3. Material-Specific Installation Instructions
How to Install Landscape Edging: Metal
- Unroll the metal edging along your trench
- Use a rubber mallet and wood block to tap the edging into position gently
- Join sections using the provided connectors
- Install stakes every 4-5 feet, driving them at a 45-degree angle
- Use a level to ensure consistent height
- Backfill soil against both sides of the edging and tamp down firmly
DIY Caution: Wear gloves when handling metal edging to avoid cuts from sharp edges.
How to Install Landscape Edging: Plastic
- Place the plastic edging in the trench
- Cut to length using pruning shears or a utility knife
- Connect sections according to manufacturer instructions
- Secure with provided stakes every 2-3 feet
- Backfill and compact soil on both sides
DIY Advantage: Plastic edging is the most forgiving for beginners and the most straightforward to adjust during installation.
How to Install Landscape Edging: Stone or Brick
- Create a 2-inch base of crushed stone or sand in the trench
- Place stones or bricks in the desired pattern
- Use a rubber mallet to tap them into place
- Check level frequently
- For mortared installation:
- Mix mortar according to package directions
- Apply 1/2-inch mortar between stones
- Allow 24-48 hours for curing before backfilling
DIY Tip: Consider dry-stacking smaller stones or bricks without mortar for a more straightforward installation.
4. Securing and Finishing Your Landscape Edging
Proper finishing ensures your DIY landscape edging will last for years:
- Backfill soil against both sides of the edging
- Compact the soil firmly to prevent shifting
- Apply mulch or decorative stone up to (but not over) the edging
- Water the area to help settle the soil
Time Estimates for DIY Landscape Edging Projects
| Project Size | Material Type | Estimated Time |
|---|---|---|
| Small (50 linear ft) | Plastic | 3-4 hours |
| Small (50 linear ft) | Metal | |
| 4-6 hours | ||
| Small (50 linear ft) | Stone/Brick | 6-8 hours |
| Medium (100 linear ft) | Plastic | |
| 6-8 hours | ||
| Medium (100 linear ft) | Metal | 8-10 hours |
| Medium (100 linear ft) | Stone/Brick | 12-16 hours |
| Large (200+ linear ft) | Plastic | 12-16 hours |
| Large (200+ linear ft) | Metal | 16-20 hours |
| Large (200+ linear ft) | Stone/Brick | 24-32 hours |
Everyday DIY Landscape Edging Mistakes to Avoid
Even experienced DIYers can make these common mistakes:
- Insufficient depth: Edging installed too shallow will push up or shift over time
- Poor soil compaction: Failing to compact soil leads to settling and unevenness
- Inadequate staking: Too few stakes or improper angle reduces stability
- Ignoring drainage: Not accounting for water flow can cause erosion around edging
- Improper connections: Gaps between sections allow grass to invade
Maintenance Tips for DIY Landscape Edging
To keep your landscape edging looking great:
- Inspect regularly for shifting or damage
- Re-stake sections that have become loose
- Clean edging periodically to remove dirt and debris
- Apply touch-up paint to metal edging if rusting occurs
- Replace individual damaged sections as needed
When to Call a Professional Landscape Service
While DIY landscape edging installation is achievable for most homeowners, certain situations call for professional landscape services:
- Large properties (over 300 linear feet)
- Significant elevation changes
- Challenging soil conditions (heavy clay or rocky soil)
- Complex designs with multiple materials
- Physical limitations that make digging difficult
- Time constraints requiring quick completion
Professional landscape services typically charge $20-40 per linear foot for edging installation, including materials and labor. While this represents a significant investment compared to DIY, the results are often more precise and durable.
Cost Comparison: DIY vs. Professional Landscape Services
| Material Type | DIY Cost per Linear Foot | Professional Installation Cost |
|---|---|---|
| Plastic | $4-12 | $20-30 |
| Metal | $12-24 | $30-48 |
| Wood | $6-16 | $24-40 |
| Concrete | $10-20 | $28-44 |
| Stone/Brick | $16-70 | $36-100 |
As you can see, DIY installation typically saves 50-70% compared to hiring professional landscape services. However, the value of professional expertise should not be underestimated for complex projects.
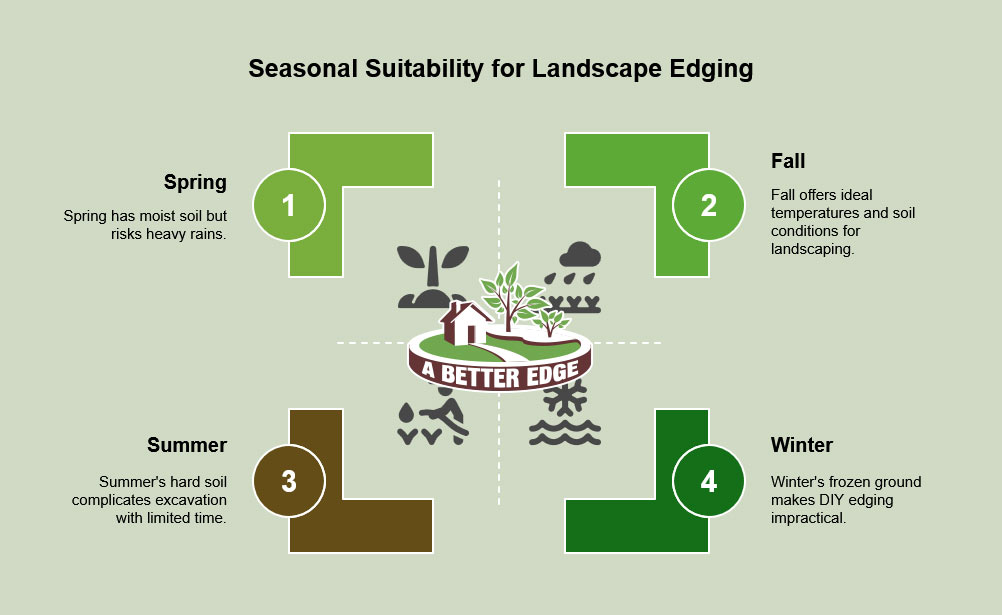
Seasonal Considerations for DIY Landscape Edging Installation
The timing of your DIY landscape edging project can significantly impact its success:
Spring
- Advantages: Soil is typically moist and workable
- Challenges: Potential for heavy rains and muddy conditions
Summer
- Advantages: Dry conditions make trench digging easier
- Challenges: Hard soil may be difficult to excavate
Fall
- Advantages: Ideal temperatures and soil conditions
- Challenges: Limited time before winter in northern climates
Winter
- Generally not recommended for DIY landscape edging installation due to frozen ground
Environmental Benefits of Proper Landscape Edging
When you install landscape edging correctly, you’re not just improving aesthetics—you’re also providing environmental benefits:
- Reduced erosion and soil loss
- Decreased water runoff
- Lower need for chemical weed control
- Improved plant health through defined growing areas
- Enhanced water conservation through defined mulch zones
Regional Considerations for Landscape Edging
Different regions require different approaches to landscape edging due to climate variations:
| Climate Zone | Recommended Materials | Special Considerations |
|---|---|---|
| Cold/Northern | Metal, stone, concrete | Install after final frost, account for heave |
| Hot/Southern | All types | Install during cooler months; consider heat expansion |
| Coastal | Aluminum, plastic, stone | Choose salt-resistant materials |
| Desert | Stone, metal, concrete | Secure thoroughly against the wind with minimal wood |
| Rainy/Wet | Metal, stone, pressure-treated wood | Focus on drainage, use rust-resistant fasteners |
DIY or Professional? Making the Right Choice
DIY Landscape Installation Indicators:
- Simple, straightforward design
- Relatively flat terrain
- Smaller project (under 200 linear feet)
- Flexible timeline
- Previous DIY experience
- Access to proper tools
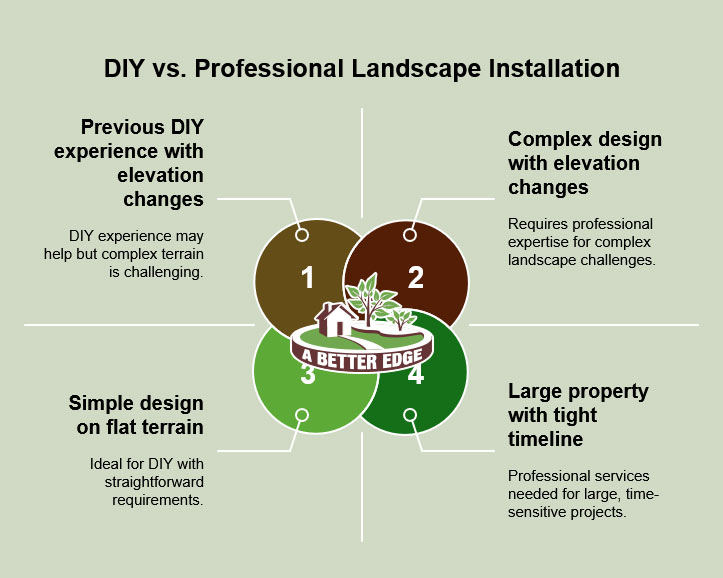
Professional Landscape Services Indicators:
- Complex designs
- Significant elevation changes
- Large properties
- Tight timeline
- Physical limitations
- The desire for warranty coverage
Conclusion: Is DIY Landscape Edging Right for You?
Installing landscape edging yourself is achievable with proper planning, the right tools, and a willingness to learn. DIY installation can save significant money for straightforward designs on relatively flat terrain while providing satisfaction and pride in your landscape.
However, if your project involves complex designs and rugged terrain, or you lack the time or physical ability, professional landscape services offer expertise that ensures optimal results.
Whether you choose the DIY route or hire professionals, quality landscape edging is a worthwhile investment that enhances your property’s appearance, reduces maintenance needs, and even increases your home’s value.
Ready to tackle your DIY landscape edging project? Follow the steps in this guide, take your time, and enjoy the transformation of your outdoor space. And remember, if you decide professional help would be beneficial, reputable landscape services in your area can provide the expertise needed for outstanding results.
A Better Edge: Professional Landscape Services in Colorado
At A Better Edge, we provide comprehensive landscape services throughout Colorado, including Denver, Colorado Springs, Monument, Castle Rock, and the surrounding areas. While we fully support DIY enthusiasts, we understand that some projects require professional expertise.
Our team specializes in all types of landscape edging installation, from simple rubber borders to elaborate stone designs and premium concrete curbing solutions. With years of experience in Colorado’s unique climate and soil conditions, we deliver durable, beautiful results that withstand our region’s freeze-thaw cycles and seasonal challenges.
Whether you need assistance with a complex project, are dealing with rugged terrain, or prefer the precision and efficiency of professional landscape services, A Better Edge is here to help transform your outdoor space with top-quality edging solutions backed by our satisfaction guarantee.
More info can be found on the UpCodes website: 501.3.3.6 Landscaping Design and Maintenance.